
AI playbook
Are you ready to transform your ideas into reality with artificial intelligence?
Start ReadingFirst builder - let's call her Sarah - proudly showed me her preparation work.
It was comprehensive! She'd spent three months studying Python (despite having no coding background), watched about 20 hours of prompt engineering theory videos, and had the most elaborate Notion dashboard I've ever seen, filled with API documentation and architecture diagrams.
But no working tool.
Then there was Mike.
Pulled out his laptop, opened up a basic AI interface, and started testing prompts for his HR consulting problem. Rough as anything, but by the end of the day, he had something that could actually help with job descriptions.
Mike's launched three basic AI tools. His first one was rough - absolutely basic stuff, looked like it was built in about 20 minutes (because it was). But here's the thing - it was DONE. It worked. Sorta.
And because it was done, he could show it to people. Get feedback. Iterate. Now his third tool actually looks half decent and, more importantly, he's got paying customers.
Meanwhile, Sarah messaged me asking for recommendations on courses about large language model architecture because she wants to "really understand the fundamentals" before starting.
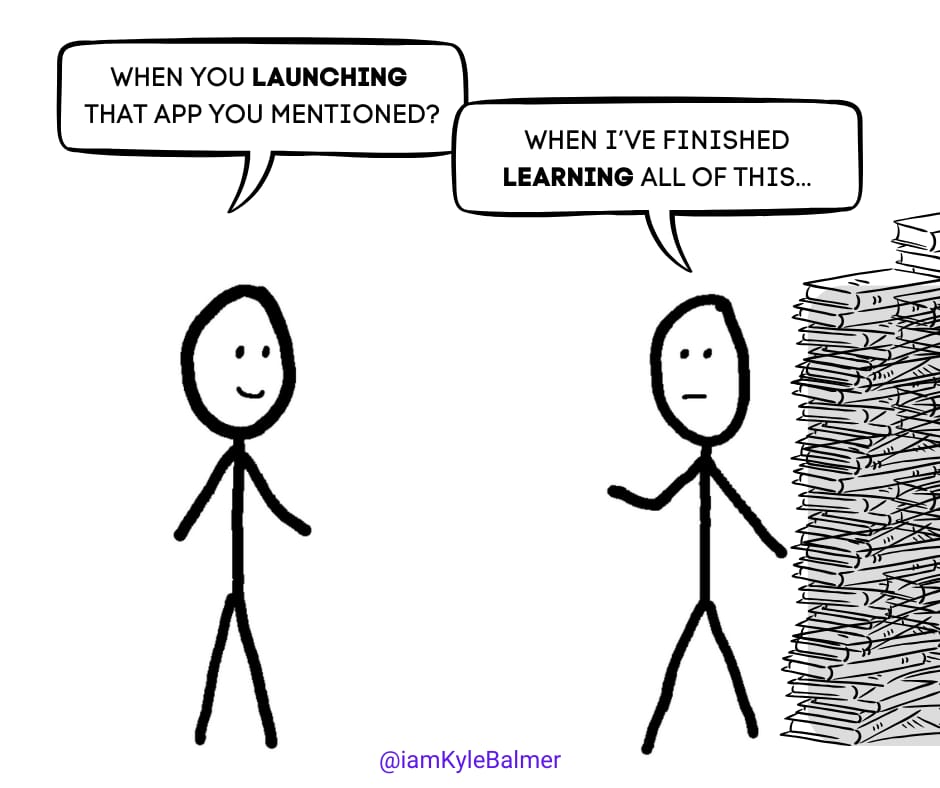
I'll take done over perfect every single time.
Perfect never happens. Done does.
Look, I get it. The temptation to learn everything first is strong. Especially if you've come from a traditional tech background where you need to understand all the moving parts before you build anything.
But here's the thing: it's 2024. The tools have changed. AI has seen to this. Our mindsets just haven’t caught up yet!
You don't need to understand how the engine works to drive the car. And you certainly don't need to know how to build an engine before you start driving. Just drive the damn thing.
That’s what we’re covering this week.
Let’s get started:
Breaking the preparation cycle
Why speed beats perfection
The minimal knowledge approach
Setting up for rapid building
Getting into action mindset
Here's what nobody tells you about building AI tools: most people never actually start. They get stuck in an endless cycle of preparation. One more tutorial. One more course. One more framework to understand.
It’s procrastination. It feels like we’re doing work. But it’s the wrong sort of work.
Basically, it's not about the knowledge - it's about the action. And action starts way before you think you're ready.
My first “big” business was co-founding a TV station in Vietnam. I was so young and naive (read: stupid!) that it didn’t dawn on me that starting a TV station in Vietnam wasn’t something you did.
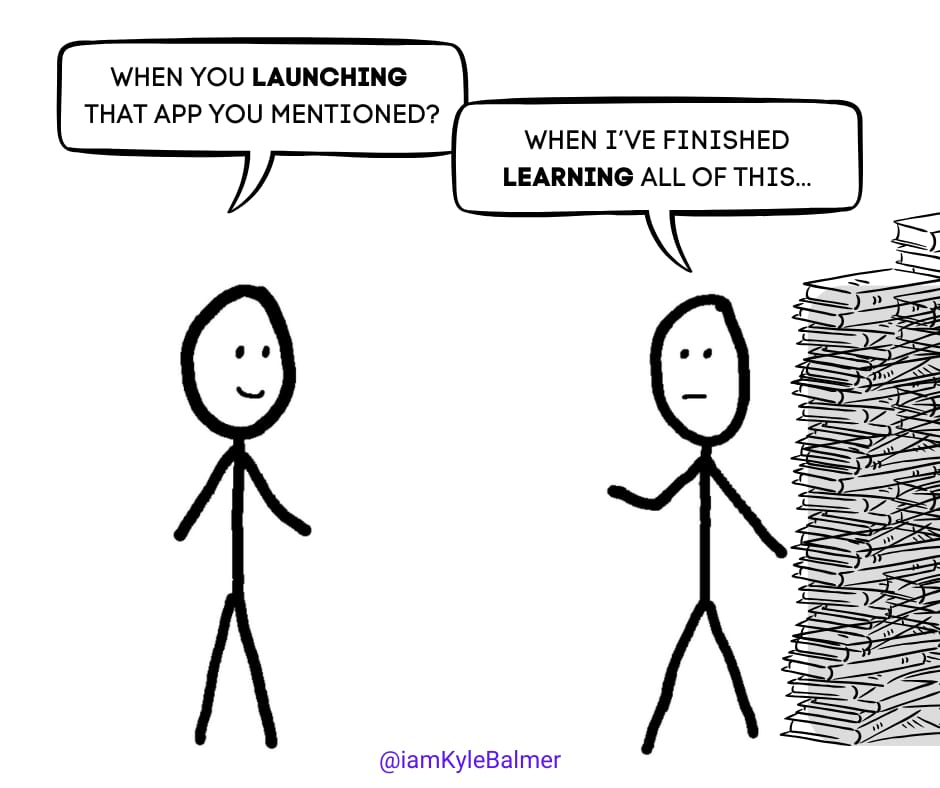
So…it got done. 9 months after starting it up we were on air.
Just starting and working it out as you go along beats careful planning every time. When we hit problems we’d work out how to get around it - either by looking it up in a book (for real!) or asking experts who had done it before.
More recently I see this wonderful example from the world of video games from creator of Balatro, a game that's been nominated for Game of the Year.
My actual production Balatro project folder is called “CardGame” and is still in my “Learning” directory, if that tells you anything about the expectations I had for the game
— localthunk (@LocalThunk)
4:19 AM • Oct 18, 2024
The game's production folder is still sitting in their "Learning" directory. They didn't wait until they'd "graduated" from learning mode - they just started building. Now they've got one of the most acclaimed games of the year. They started before they were ready, learned while building, and shipped something incredible.
We need to break down the barrier between learning mode and doing mode.
You will always be in both. You never graduate from learning mode - you just start building while you're in it.
The beauty of modern AI tools is that they've changed the game entirely. You don't need to front-load learning anymore. The tools themselves guide you. They teach you. They grow with you.
Hit a technical roadblock? No problem - you just ask AI how to get around it and it’ll give you the steps. Hell, it’ll even implement the fixes for you in some tools.
Think about it: ten years ago, building any kind of software tool meant years of learning. Now? The barriers have entirely dissolved.
Looking at Mike's journey, what made the difference wasn't his technical knowledge - it was his willingness to start before he felt ready.
His first tool was rough. Embarrassingly basic. But it existed. And that's the key difference.
While Sarah was planning the perfect architecture, Mike was:
Testing basic ideas
Getting real feedback
Learning from actual usage
Improving based on reality
Moving forward every day
The hardest part isn't the building - it's breaking free from the "I need to learn more first" mindset.
Stop asking:
"What do I need to learn?"
"What if I do it wrong?"
"What's the best way to structure this?"
Start asking:
"What's the smallest thing I could test?"
"Who could I show this to?"
"What's the fastest way to get feedback?"
You’ll get all 60+ AI Business Courses. PLUS this week’s (not to be missed) ‘Build your own AI App’ series.
Use CODE: CYBERDEAL at checkout
Over the next four parts of this playbook, we're going to build your first AI tool - fast. No fluff, no theory, just pure action:
Part 2: Preparing Your Base Prompt We'll use ChatGPT to craft and test your core prompt. One input, one output. No fancy stuff - just getting your basic flow working.
Part 3: Moving to a Simple Platform Time to give your prompt a home. We'll look at the easiest deployment options and get your tool online without any coding needed.
Part 4: Creating Clear Instructions We'll make sure your tool is crystal clear to use. Adding instructions, example inputs, and the knowledge it needs to work properly.
Part 5: Getting Ready to Share Basic testing and tweaks to make sure your tool doesn't fall flat when people try it. Making it share-worthy without overcomplicating things.
Remember: Mike's first tool looked like it was built in 20 minutes because it was. But three months later, he's got paying customers while Sarah's still getting ready to start. We need to get through that first 20 minutes! That’s the only goal this week!
Keep Prompting,
Kyle
Had a proper first-world problem moment a little while back. Needed a storage box for my kitchen - something to fit inside my kitchen cupboards.
What a faff! Spent nearly an hour on a box website (I know right FUN!), squinting at dimensions, trying to work out if each box would fit my space.
Not too big that it wouldn't fit under the desk, not so small there'd be wasted space.
My calculator was getting more action than it had since uni.
Posted about my dimension-induced headache on X/Twitter. Standard moaning British post - "why isn't there a tool for this?".
An hour later, someone dropped in my DMs. "Made you a thing," they said.
What they'd built was dead simple. They'd scraped a list of storage boxes off a popular website, dimensions and all. Added a basic prompt that asked what space you were trying to fill, and it spat back three box recommendations that would fit.
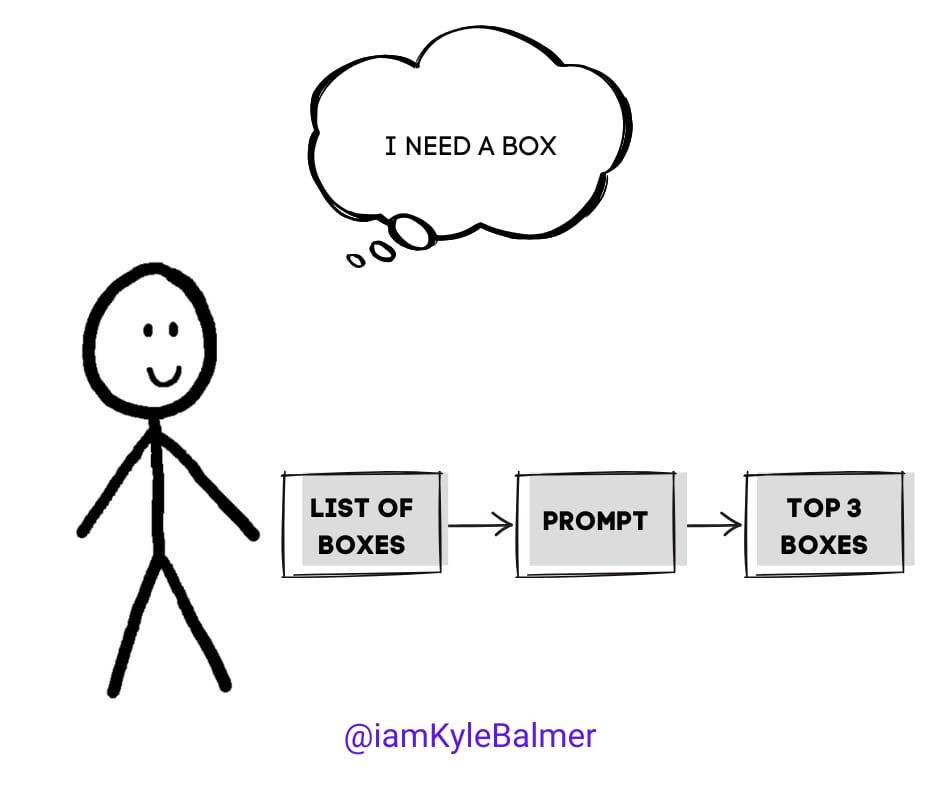
That's it. Basic as anything. But solved the problem perfectly.
The person who built this was Cien - we'll talk more about her tomorrow when we look at the platform she's built. But today I want to focus on crafting that perfect base prompt. The foundation of any AI tool.
Let’s get started:
Starting with ChatGPT interface
Using Claude's prompt creator
One input → one output focus
Refining your prompt
Testing variations
Let's break down exactly what Cien built:
Input: A list of boxes pulled from a website, including dimensions
Process: A prompt that asked users what space they needed to fill and checked their dimensions against the list
Output: Three box recommendations that would fit
Boring? Absolutely! But that's exactly why it worked. No fancy features, no complex logic - just a simple tool that solved a specific problem.
And here's the thing - that basic foundation could go anywhere. Polish it up for a few days and you could sell it to box manufacturers for thousands. Or turn it into a tool that recommends boxes on Amazon and collect affiliate fees. Easy money from something that started with a basic prompt.
That's exactly what we're going to build today - that first foundation. The basic building block that proves our idea works and has value. Everything else - platforms, interfaces, fancy features - that all comes later. (And we’ll cover them shortly).
Before we dive into fancy tools or platforms, we're starting in the simplest possible place: ChatGPT's interface. Think of it as your prompt testing ground.
Why ChatGPT first? Because it's fast, forgiving, and free. And….you probably already use it!
You can test and refine your prompt dozens of times without any setup or cost. This is where you'll find the core of what works.
For the box finder, the first tests were just: "Here's a list of boxes [list]. A user needs a box for a space that's [dimensions]. Recommend three that would fit." And an uploaded (or even copy/pasted) list of boxes with their dimensions.
Simple? Yes. But it proved the concept worked before adding any complexity. And that's exactly what we want - proof that our basic idea works.
Here's where most people go wrong - they try to handle multiple cases, add fancy formatting, build in complex logic. Don't! Please! Your first prompt should do ONE thing well.
Think about it like this: Input: What's the ONE thing you're giving the AI? Output: What's the ONE thing you want back?
For Cien's box finder:
Input: Space dimensions
Output: Three box recommendations
That's it! No fancy formatting. No complex decision trees. Just one thing in, one output out. If you're writing more than three lines of prompt at this stage, you're probably overcomplicating it.
You’ll get all 60+ AI Business Courses. Premium Newsletter. And Future Courses for free.
Use CODE: CYBERDEAL at checkout
Once you've got something working in ChatGPT, you might want to write a more robust prompt from scratch. That's where Claude's prompt creation tool comes in handy.
To access it:
You'll see a menu with three prompt-focused options:
Write a prompt from scratch
Generate a prompt
Improve an existing prompt
It looks like this:
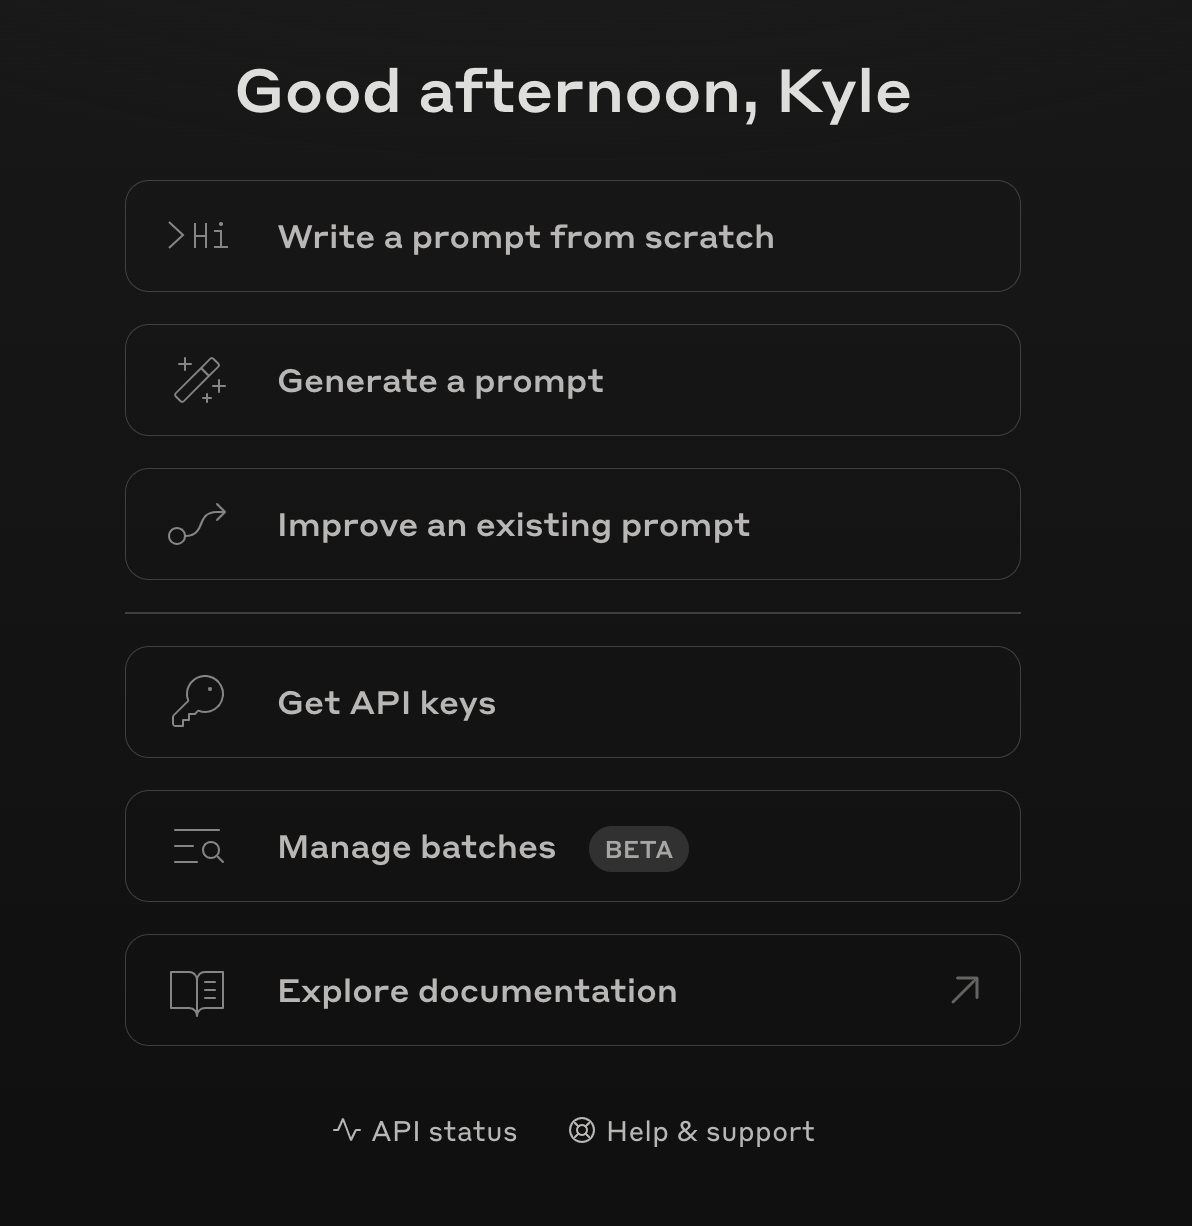
You can use Generate a Prompt to help get your first draft prompt done. Make sure to test it!
But here's the thing - this step is optional. If your ChatGPT prompt is working, you can skip straight to step 3. Don't add complexity just because you can.
Using the same Anthropic Console above, select "Improve an existing prompt". The improver excels at making prompts more robust for complex tasks that require high accuracy.
Simply paste in your working prompt and it'll help:
Add clear step-by-step reasoning
Define explicit output formatting
Guide the AI through proper analysis
You can also add:
Any specific issues you're seeing (optional)
Example inputs/outputs if you have them
This may be overkill. It’ll depend on the complexity of the task honestly. The only way to know is to test the prompt - see what it’s results are like and if more refinement is needed.
Whatever stage you're at - ChatGPT testing, prompt creation, or improvement - the key is to test variations. Try different ways of asking for the same thing. You might find that a slight change in wording makes a huge difference in results.
We’ll cover this fully in Part 5 but you can (and should) be testing as you go.
For example, with the box finder:
Version 1: "Find boxes that fit these dimensions"
Version 2: "Recommend boxes that maximize this space"
Version 3: "List the three most efficient boxes for this space"
Each slight variation might give you different results. Test them all. Keep what works.
Next we're moving your refined prompt onto a proper platform. That's where we'll meet Cien properly and see how she turned these simple prompts into proper tools.
But right now get something basic working. Then, if you need it, use the prompt creation and improvement tools to make it bulletproof.
Keep Prompting,
Kyle
There's a certain temptation when building AI tools to do everything yourself.
This is my go-to reaction: “I can do this myself!!”
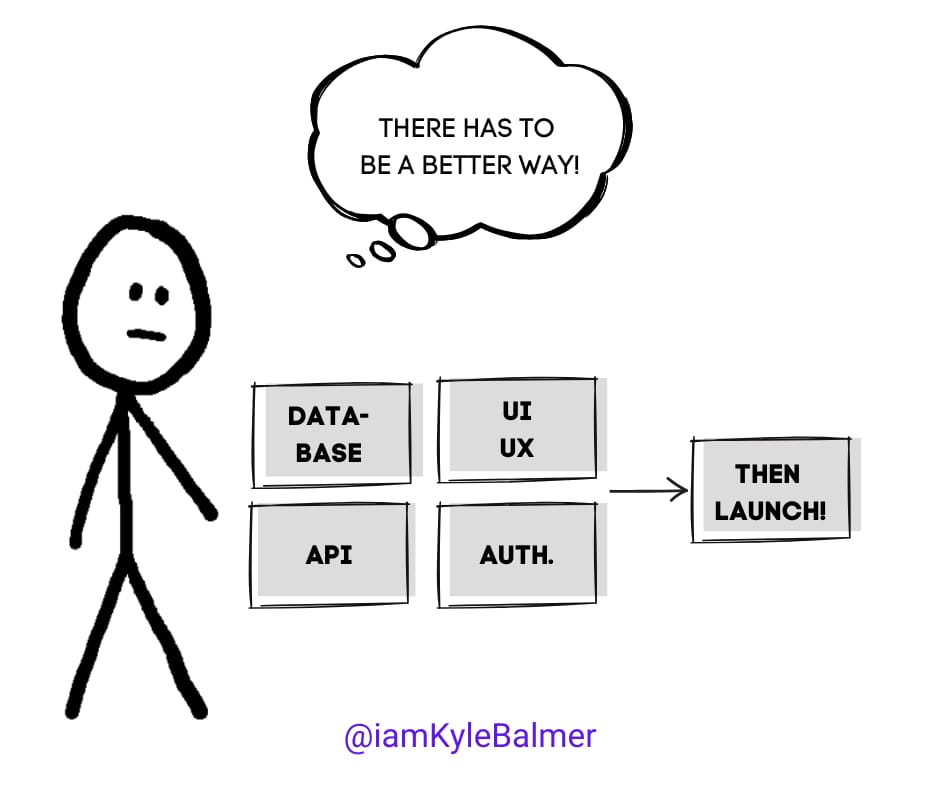
After all, if you know how to code, you could build a custom application, hook it up to the OpenAI API, handle the authentication, set up a database, create a nice interface...
All perfectly doable if you're technically minded! In fact it’s getting easier day by day with new AI coding tools like Cursor and Windsurf.
But here's the thing - it's a massive time sink. Setting up infrastructure, debugging API calls, handling rate limits, building user interfaces. Before you know it, you're three weeks in and haven't even started on the actual useful bit of your tool.
And that's assuming you know how to code! If you read the above and it was gobblygook then even more reason to avoid! If you don't know about this sort of stuff, you're looking at months of additional learning before you can even start.
But we’re AI entrepreneurs. We want to build and launch ASAP.
Let’s get started:
Why platforms beat DIY
Introduction to Launch Lemonade
Choosing your model
Basic setup walkthrough
Getting your first app live
Yesterday we looked at crafting the perfect prompt. Today we're giving that prompt a home - somewhere users can actually interact with it.
It’s no good just having our prompt in ChatGPT. We want to able to sell access to our tool - which means just giving them a prompt isn’t going to hack it. We’ll need a way for people to sign up, pay, access your tool etc. etc.
This adds layers of complexity beyond the simple input, process, output we’ve been discussing so far. We need a vehicle around the work we’ve done so far.
Sure, you could build everything yourself. It's totally doable. But here's the thing - every hour spent setting up infrastructure is an hour you're not spending on what matters: solving your users' problems.
Remember Cien from the last part? She helped me build a box finder in a couple of hours.
Turns out she can build more than a simple box finder! She’s the co-founder of LaunchLemonade, a no-code platform that lets you build AI tools without worrying about the technical stuff.
Think of it as a layer of abstraction - you focus on what your tool does, they handle how it does it.
Think about driving a car. You don't need to understand how the engine works to drive - you just need to know about the steering wheel, pedals, and gear stick. The complex stuff is hidden away, letting you focus on getting where you need to go.
Hell, reading a book about all the inner workings of a car would get you no closer to being able to drive to the shops.
That's exactly what a platform like LaunchLemonade does. Instead of worrying about APIs, authentication, and databases (the engine), you just focus on what matters: your prompt and how users will interact with it (the steering wheel and pedals).
Building AI tools can work the same way. Let the platform handle the complex bits while you focus on making something useful.
Key features that matter for us:
Access to 16+ AI models (ChatGPT, Claude, Gemini, LLaMa etc.)
File and image handling built-in
Ability for users to register and pay for your tool
Simple publishing process
But most importantly - you can go from prompt to working tool in minutes, not weeks.
I’ll tag Cien in to introduce and give an intro herself:
Here’s a sign up link too to get access. Not an affiliate, just a fan of the tool: https://launchlemonade.app/
We’ll get into the details of exactly how to set up your instructions, database and other building blocks of your app in the next Part.
For now though let’s cover the issue of what model to use!
When using a tool like LaunchLemonade you have access to more than just ChatGPT. There may be a better model for your particular task. Choosing the right model is a super important first step because they’ll perform differently.
Ultimately I recommend testing your prompts and the tool with lots of different models to see what comes out with the best result. But because there are so many we can at least try to narrow it down first.
Let’s use a prompt to suggest a model:
You are an AI model selection specialist. Based on the following parameters, recommend the best AI model for this specific use case.

Project Parameters:
Purpose: [Describe what your tool will do]
Input: [What information are users providing?]
Process: [What transformation/analysis needs doing?]
Output: [What results are users expecting?]

Please provide:
1. Primary model recommendation with reasoning
2. Alternative options with reasoning
3. Key considerations for this use case
4. Any potential limitations to be aware of
For example, with yesterday's box finder:
Purpose: Recommend storage boxes based on space dimensions
Input: User's available space measurements
Process: Compare against product database
Output: Three best-fitting box recommendations
The prompt suggested GPT-3.5 since it's:
Cost-effective for simple comparisons
Fast enough for real-time recommendations
More than capable of handling basic dimension matching
Perfect for this kind of straightforward matching task
Key here is that the recommendation is not the objectively best model. Because there’s no need! More advanced models cost more to deploy and are slower. So we generally want to use the model that is “good enough” and no more.
FYI Cost per usage is less of a problem when using LaunchLemonade because it’s flat pricing. When using direct API we pay for each query (a further complication).
Head over to LaunchLemonade and create your account. I’m not an affiliate and this isn’t sponsored. Feel free to use another tool if you prefer! But I’ll be sticking to LaunchLemonade for these tutorials.
Don't worry about building anything yet - just get familiar with the interface. Click around. Break things (in testing, obviously!).
Keep Prompting,
Kyle
A student showed me their first AI tool recently.
After a fair amount of prodding and haranguing. They were hiding something!
We hopped on a call and they were gutted - "the outputs are rubbish," they said. They wanted to trash it all and start again.
First we had a look into the tool. The prompt was solid, the logic was sound, but something was missing.
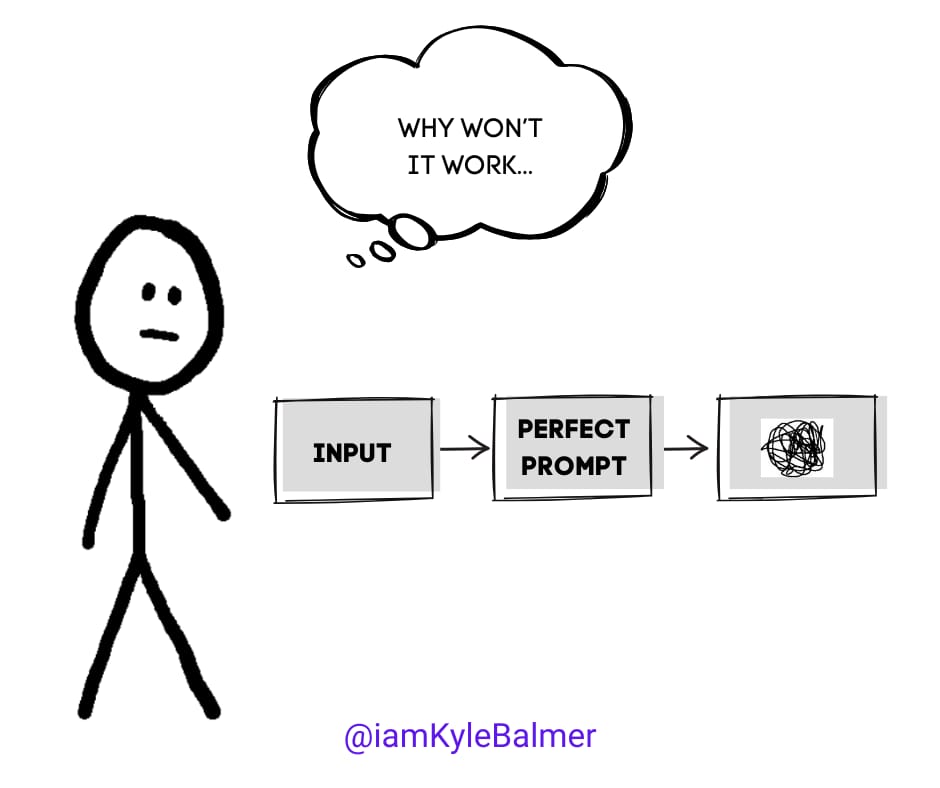
Turned out they'd just dumped their raw prompt into the platform.
No context. No instructions. No background knowledge.
It was like hiring an expert consultant but not telling them anything about your business or what you actually needed.
We added some basic instructions and background info - suddenly the same prompt was producing brilliant results. The difference wasn't the prompt - it was giving the AI the additional context it needed to actually help.
Let’s get started:
You’ll get all 60+ AI Business Courses. Premium Newsletter. And Future Courses for free.
Use CODE: CYBERDEAL at checkout. (One day left…)
Why raw prompts often disappoint
The Goldilocks principle of context
Finding the right level of specificity
What information to provide
Testing and refining instructions
Think about hiring someone on Upwork to write proposals for your business. What would they need to know?
Basically you are answering the question: "If a human was doing this task for the first time, what would they need to know?"
Then:
Write down everything you think they'd need
Cross out anything not directly relevant to the task
Add any task-specific requirements or constraints
Include style/tone guidance if output format matters
Too little context ("Write me a proposal") and you'll get generic waffle. Thanks ChatGPT!
Too much ("Here's every proposal we've written since 2015, our entire company history, and a breakdown of our competitor landscape") and they (the human or the AI!) will get lost in the details.
The sweet spot? Exactly what they need to know for THIS task:
Your company's relevant experience for THIS project
Previous successful proposals for SIMILAR work
The specific tone and style you want
Any particular requirements or constraints
Modern AI platforms make it easy to give your tools additional context. Whether you're using Claude Projects, LaunchLemonade, or any other tool, you can typically add context in two ways.
Project-Level Knowledge:
Company information
Brand guidelines
General policies
Standard processes
Reusable reference materials
Tool-Specific Knowledge:
Task-specific data
Relevant examples
Specific constraints
Output format requirements
Think of project-level knowledge as what ALL employees at your company should know, and tool-specific knowledge as what someone needs for this particular task. We need to provide both.
Let's use this prompt to figure out exactly what context your tool needs:
Help me identify what context an AI tool needs to perform its task effectively. Analyse the following tool purpose and provide three levels of context:

Tool Purpose: [Describe what your AI tool will do, including inputs, outputs and processes]

For this type of tool, provide:
1. Minimal Context (bare bones, likely to produce poor results)
2. Context Overload (too much irrelevant information)
3. Perfect Context (exactly what's needed)

For the "Perfect Context" level, break down exactly what information should be provided and why it's necessary for the task. Sort by:
- Essential company/product information
- Relevant background knowledge
- Style/tone requirements
- Task-specific parameters
- Any relevant constraints or limitations

Explain why each piece of information is necessary for the task.
Let's look at some examples to make this more concrete.
Marketing Copy Tool
❌ Too little: "Write social media posts for our product"
❌ Too much: [Entire company history, every past post, all competitor data]
✅ Just right:
Target audience demographics and preferences
Key product benefits and features relevant to THIS campaign
Brand voice guidelines (casual, professional, witty?)
Campaign goals and CTAs
Platform-specific requirements
Product Recommendation Engine
❌ Too little: "Recommend products based on user input"
❌ Too much: [Every product spec, all customer reviews, full pricing history, all past transcations]
✅ Just right:
Current product catalogue with key features
Basic price points and availability
Common use cases and customer needs
Any current promotions or focus products
Recommendation criteria (price, features, popularity)
Get the idea? Here's are some quick rule of thumbs to help you know if you are on the right track.
Too little context if:
Outputs are generic
AI asks lots of clarifying questions
Results miss key requirements
Too much context if:
AI gets distracted by irrelevant details
Outputs are inconsistent
Responses meander off topic
Just right when:
Outputs are specific and relevant
AI stays focused on the task
Results match your requirements
Because you are a subject matter expert remember? You are building for an industry that you know.
This is crucially what differentiates your tool from a generic one spun up by AI. You have the discernment and taste to know if the outputs are good or not!
We’ll build on this tomorrow when we get into testing properly.
Keep Prompting,
Kyle
Picture it. Posting your first AI tool in our community: "Please try it and give feedback!"
Then sitting there refreshing the page, waiting for responses.
Twenty-four hours later: zero responses.
The tool itself? Actually pretty decent. Did exactly what it promised, worked perfectly fine for you.
But here's what happened: people clicked the link, saw a blank text box with no instructions, tried random inputs that gave weird responses, and left.
Those people? They're never coming back. Doesn't matter how much you improve the tool now - you've lost them at hello.
Let’s get started:
The Five Second Rule
Crafting your welcome message
Example inputs that work
Basic error prevention
Setting up for feedback
No, not the one about dropped food (though if you're eating while building AI tools, I admire your multitasking skills!).
I'm talking about the reality of first impressions. It’s like meeting someone in real life. You have scant moments to make a positive impression. Fail to do so and they’ll not be interested - or, worse - actively dislike you.
Harsh? Yes. True? I’m afraid so.
Ditto with your tool. When someone lands on your AI tool, you've got about five seconds before they decide if it's worth their time.
Don’t muck it up!
Think about using a new app. If you open it and have no clue what to do next, how long before you close it? Exactly.
Your tool needs to pass what I call the "Five Second Test":
What does this thing do?
How do I use it?
Will it actually help me?
If users can't answer these in five seconds, they're gone. And they're probably not coming back. Why would they?
Your welcome message isn't just a greeting - it's your tool's handshake, elevator pitch, and user manual all rolled into one.
Here's what a good one needs:
Clear purpose ("This tool helps you...")
How to use it ("Just enter...")
Example inputs ("Try something like...")
What to expect ("You'll get...")
Let’s use a prompt to help you craft one:
You help create clear, engaging welcome messages for AI tools. Based on the tool details provided, generate:

1. Opening greeting that sets the tone
2. One clear sentence explaining the tool's purpose
3. Quick instruction on how to use it
4. 1-2 example inputs that showcase common use cases
5. Expected outputs for each example
6. Any important limitations or requirements

Tool Details:
[Describe your tool's purpose and functionality]

Provide both casual and professional versions of the message, explaining when each might be more appropriate.
You want this to be short and punchy.
Note: if the explanation is long and convoluted this may be because your tool isn’t focused single use like we discussed! Remember when we discussed not building an all-in-one tool and instead keeping it focused? Be mindful here.
We’re going to include your welcome message here if using LaunchLemonade:
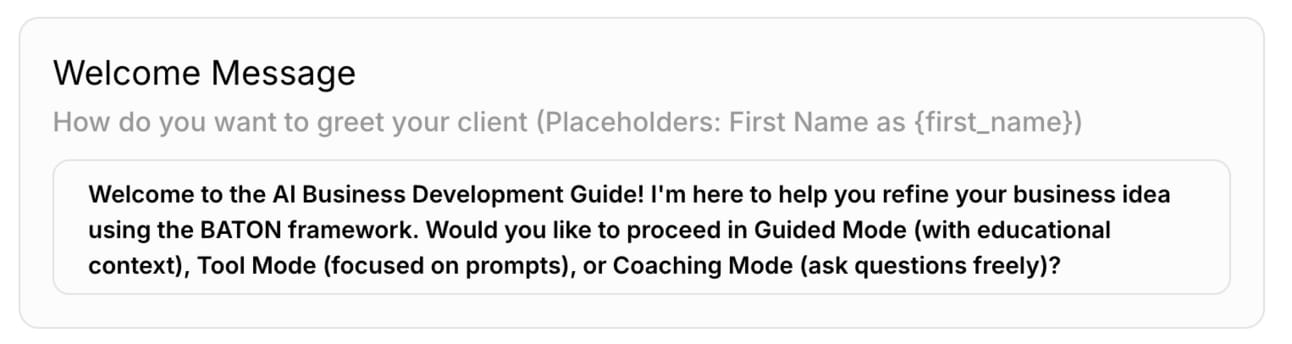
Spend a good amount of time refining your welcome message. If people don’t make it past this message then all your subsequent work is wasted!
We’ll be diving more into refining, testing, collecting feedback and turning this into a proper “product” in the next Playbook.
Let’s take a moment to recap what we’ve covered though as it’s a lot!
Part 1: Stop Planning, Start Building We broke free from the preparation trap. Remember Sarah with her elaborate Notion board vs Mike who just started building? The key lesson: movement creates clarity. You learn more from doing than planning.
Part 2: Prepping Your Base Prompt We started in ChatGPT, crafting that first basic prompt. No fancy tools, no complex systems - just getting that core input/output working. One thing in, one thing out. The foundation of everything that followed.
Part 3: Moving to LaunchLemonade Time to give our prompt a proper home. We could have built everything from scratch, but why? Platforms exist to handle the complex bits while we focus on what matters - making something useful. We chose Launch Lemonade for its simplicity and direct access to multiple AI models.
Part 4: Adding Context This is where our tools started getting smart. We learned about the Goldilocks principle of context - not too much, not too little. Just like hiring someone on Upwork, we figured out exactly what information our AI needs to do its job well.
Part 5: Getting Ready to Share Finally, we made our tools user-friendly by nailing the welcome message. Fail here and we’ve lost them!
In the next Playbook we're diving into proper testing and refinement. We'll look at:
Error handling
Gathering meaningful feedback
Making iterative improvements
Scaling what works
Packaging into a product
But for now, you've got everything you need to build your first AI tool. Remember - it doesn't need to be perfect. It just needs to exist! That’s the big takeaway.
The real learning starts when you put something out there and see how people use it. So go build something. Make it simple, make it clear, make it helpful. The rest comes later.
Keep Prompting,
Kyle
Are you ready to transform your ideas into reality with artificial intelligence? 'Building Your First AI App' is the ultimate playbook designed for aspiring builders like you who are eager to dive into the world of AI. In just five parts, this playbook takes you through a hands-on journey where you'll learn to build and launch your first AI tool—quickly and effectively. Whether you're starting from scratch or already have some experience, this guide is packed with actionable insights that empower you to stop learning and start building.
This playbook is designed for entrepreneurs, marketers, and tech enthusiasts who are eager to leverage AI but feel overwhelmed by the technicalities. You may be struggling with procrastination, caught in a cycle of endless learning without taking action, or facing challenges in transforming your concepts into workable applications. This guide is perfect for you, providing a clear, structured approach to building your first AI app and helping you overcome the barriers that have been holding you back.
No! This playbook is designed for beginners and requires no prior coding experience. You'll learn step-by-step, with practical examples to follow.
The playbook is structured to be completed at your own pace, but you can realistically build your first AI app in just a few hours across the five parts.
You'll have access to community support where you can ask questions and get feedback from fellow builders and mentors.
While the playbook is tailored for beginners, advanced users may find value in the rapid building mindset and practical tips for user engagement.
Absolutely! The principles and techniques outlined can be applied to various AI projects beyond the initial tool you'll build.